How to Upgrade Speaker Terminals on Marantz 2230, 2235B, 1060
In this guide
- Why the Original Terminals Need Replacing
- What You Need
- Step 1 — Check Your Original Terminals
- Step 2 — Remove the Mounting Screws
- Step 3 — Free the Terminal Assembly
- Step 4 — Assemble the Front Adapter Plate
- Step 5 — Install the Inner Adapter Plate
- Step 6 — Connect the Speaker Wires
- Step 7 — Final Inspection
- Frequently Asked Questions
Why the Original Terminals Need Replacing
- Oxidation and corrosion on contact surfaces
- Loosened spring tension, causing intermittent contact
- Incompatibility with banana plugs, spade terminals, and thick cables
- Mechanical wear from repeated cable changes
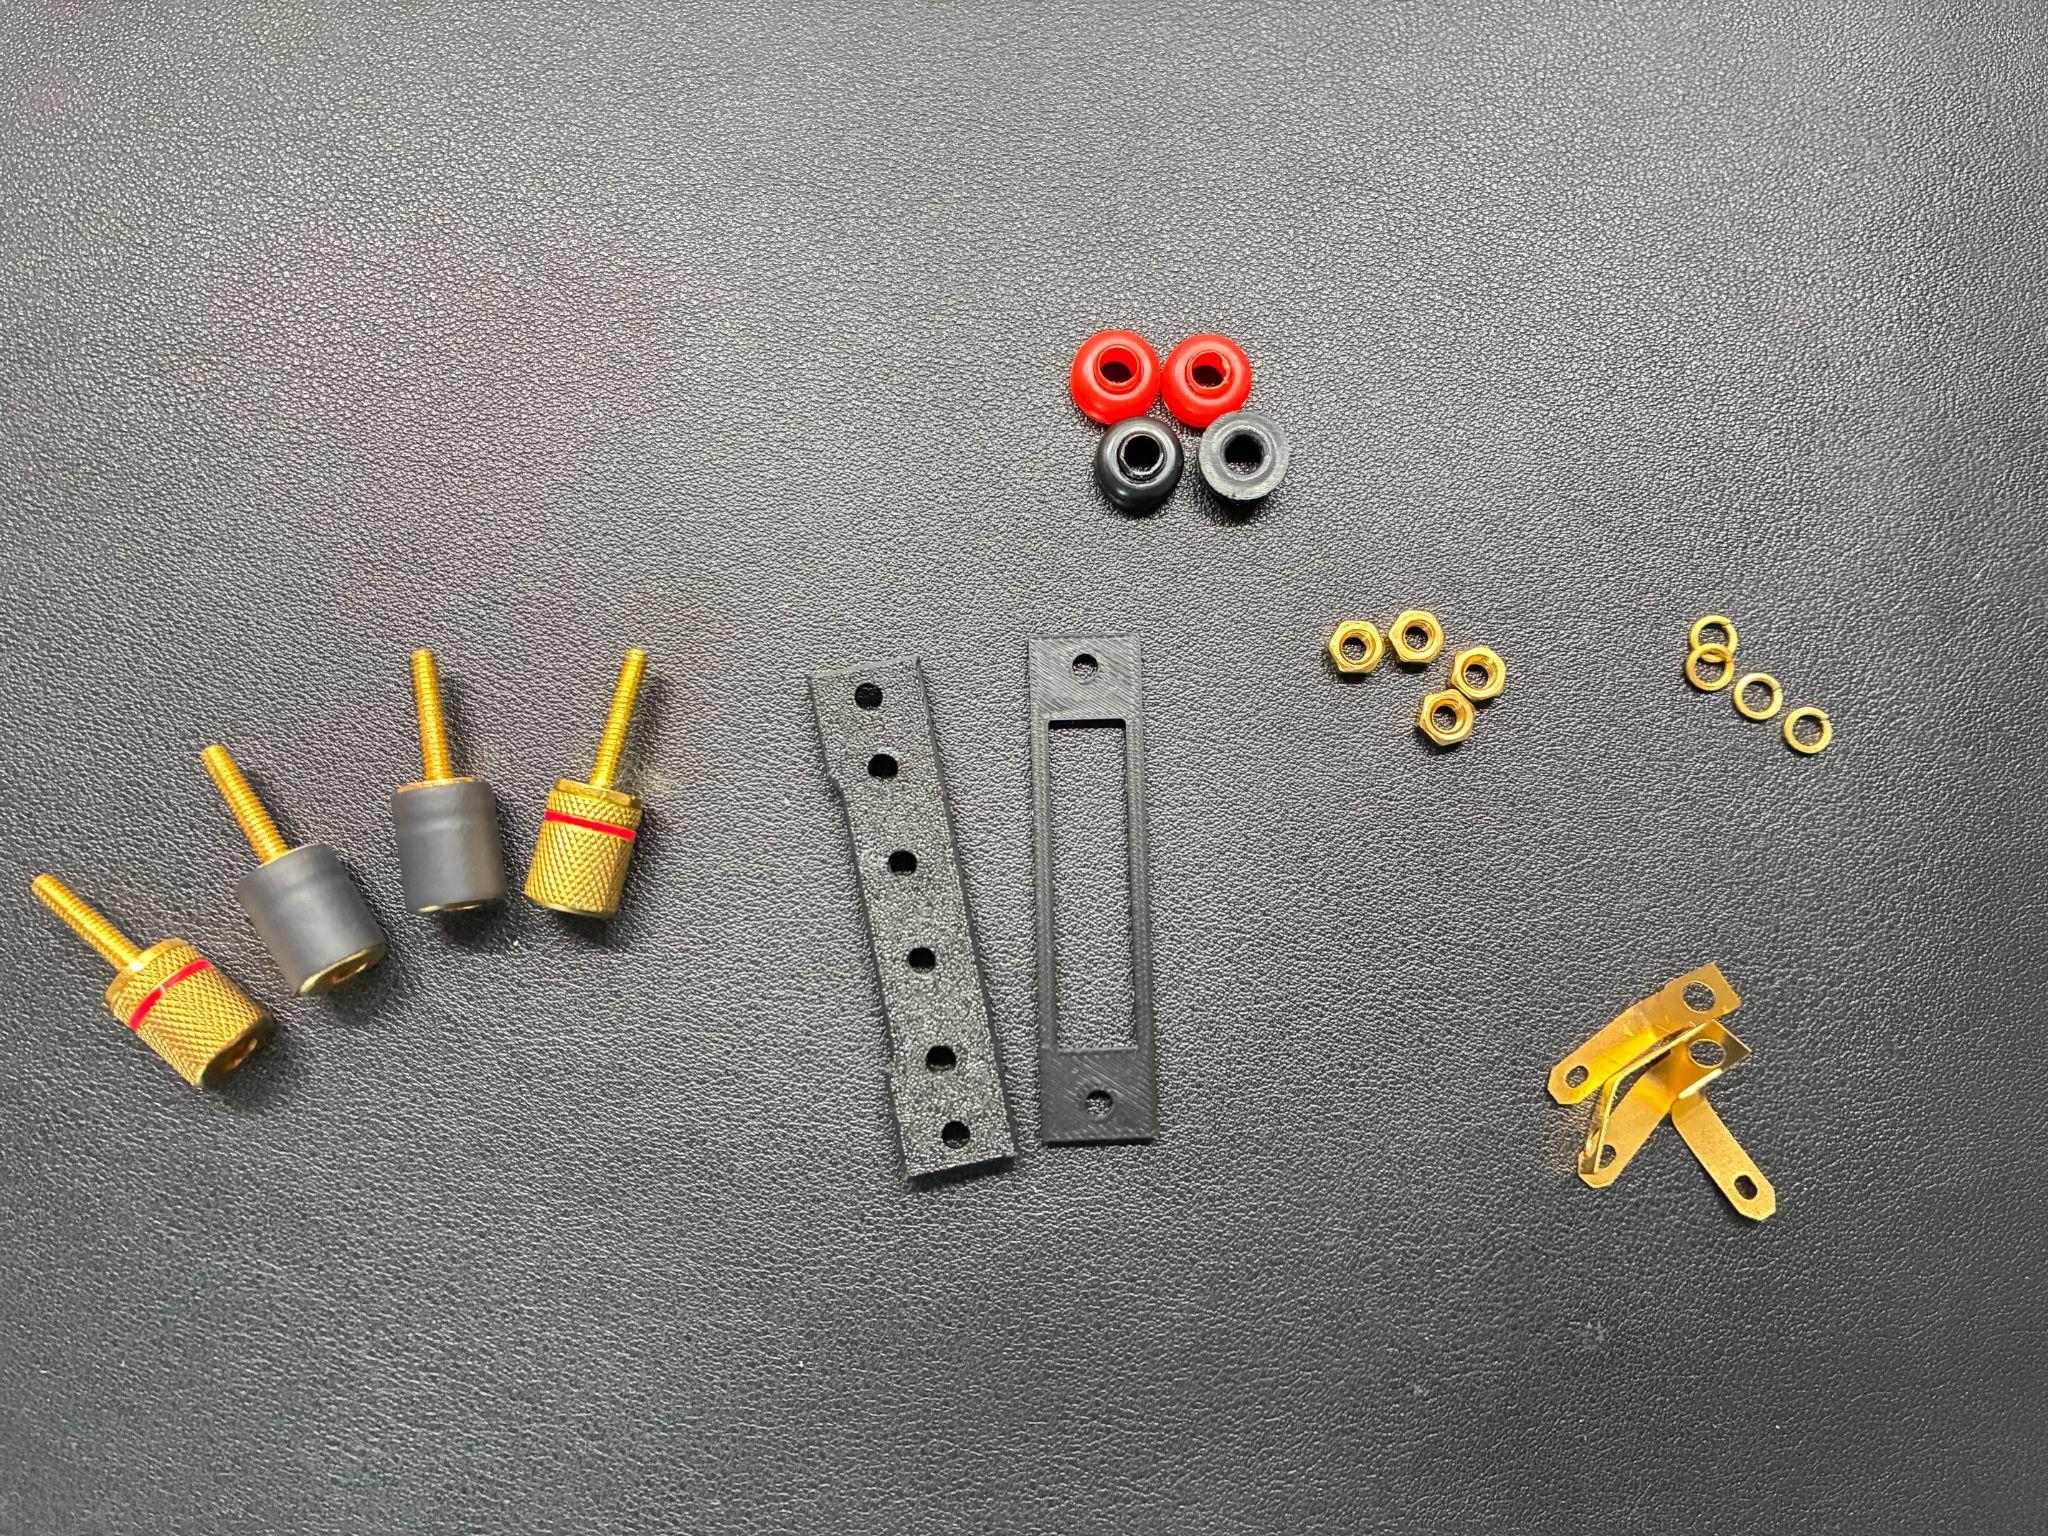
What You Need
- Phillips screwdriver
- Soldering iron + solder
- Desoldering pump or wick
- Small pliers or nut driver (for M4 nuts)
- HiFiHub Speaker Terminal Upgrade Kit (includes 2 adapter plates + 4 binding posts)
The kit is specifically designed for the narrow rear panel cutout on these Marantz models. Standard terminals cannot be installed without the adapter plates.
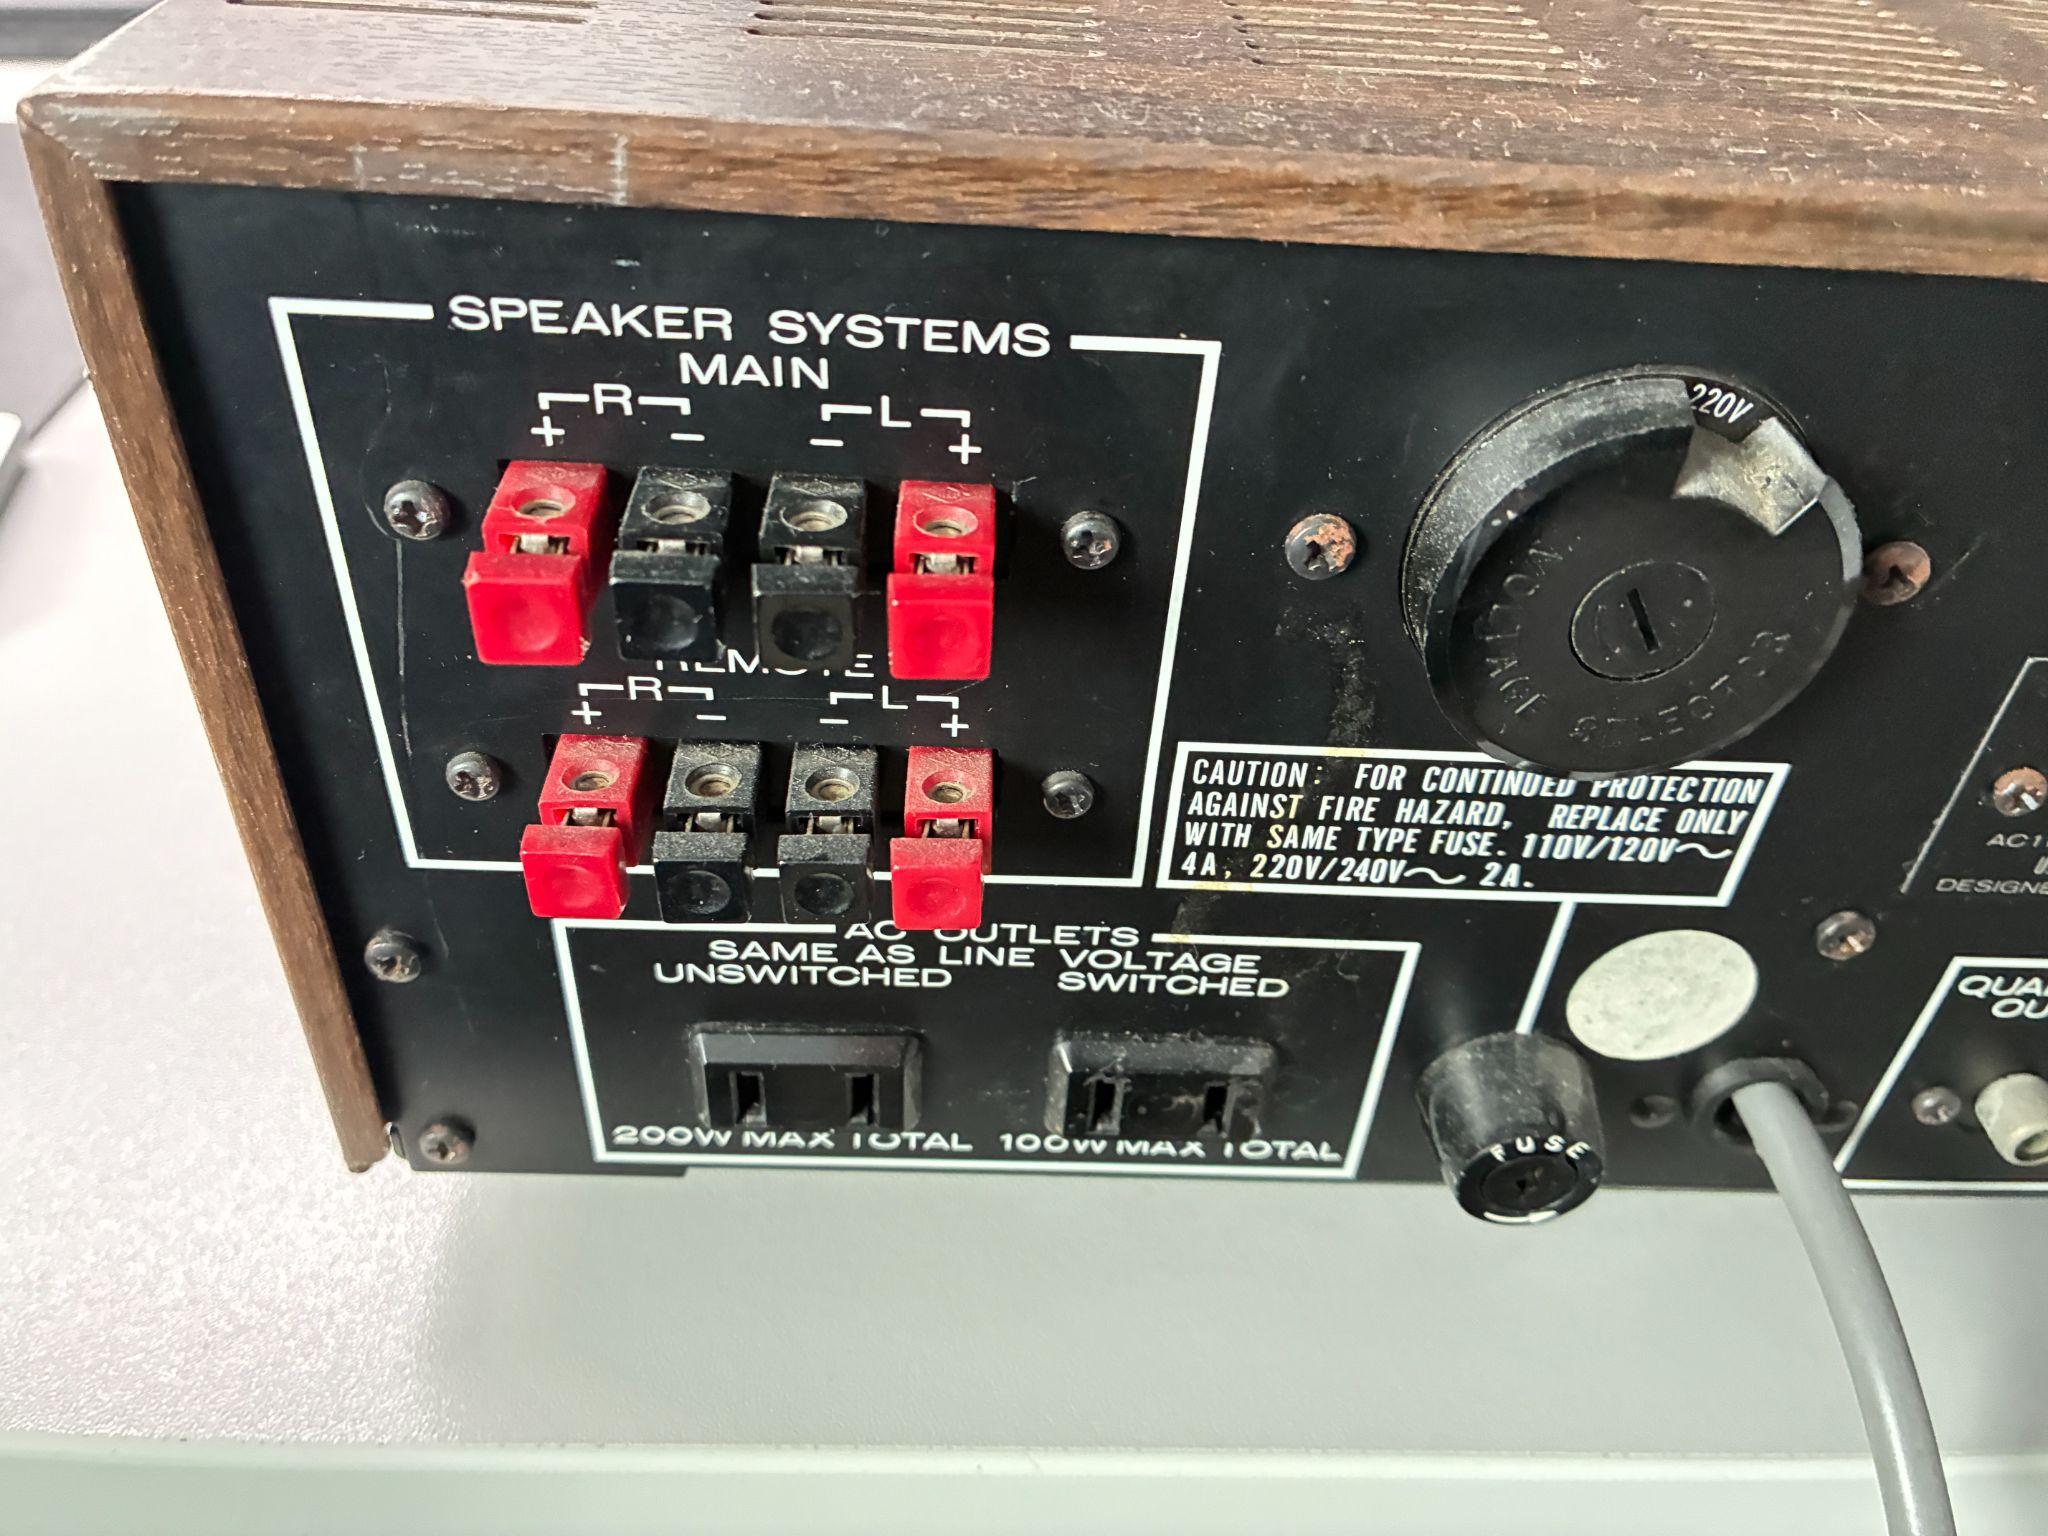
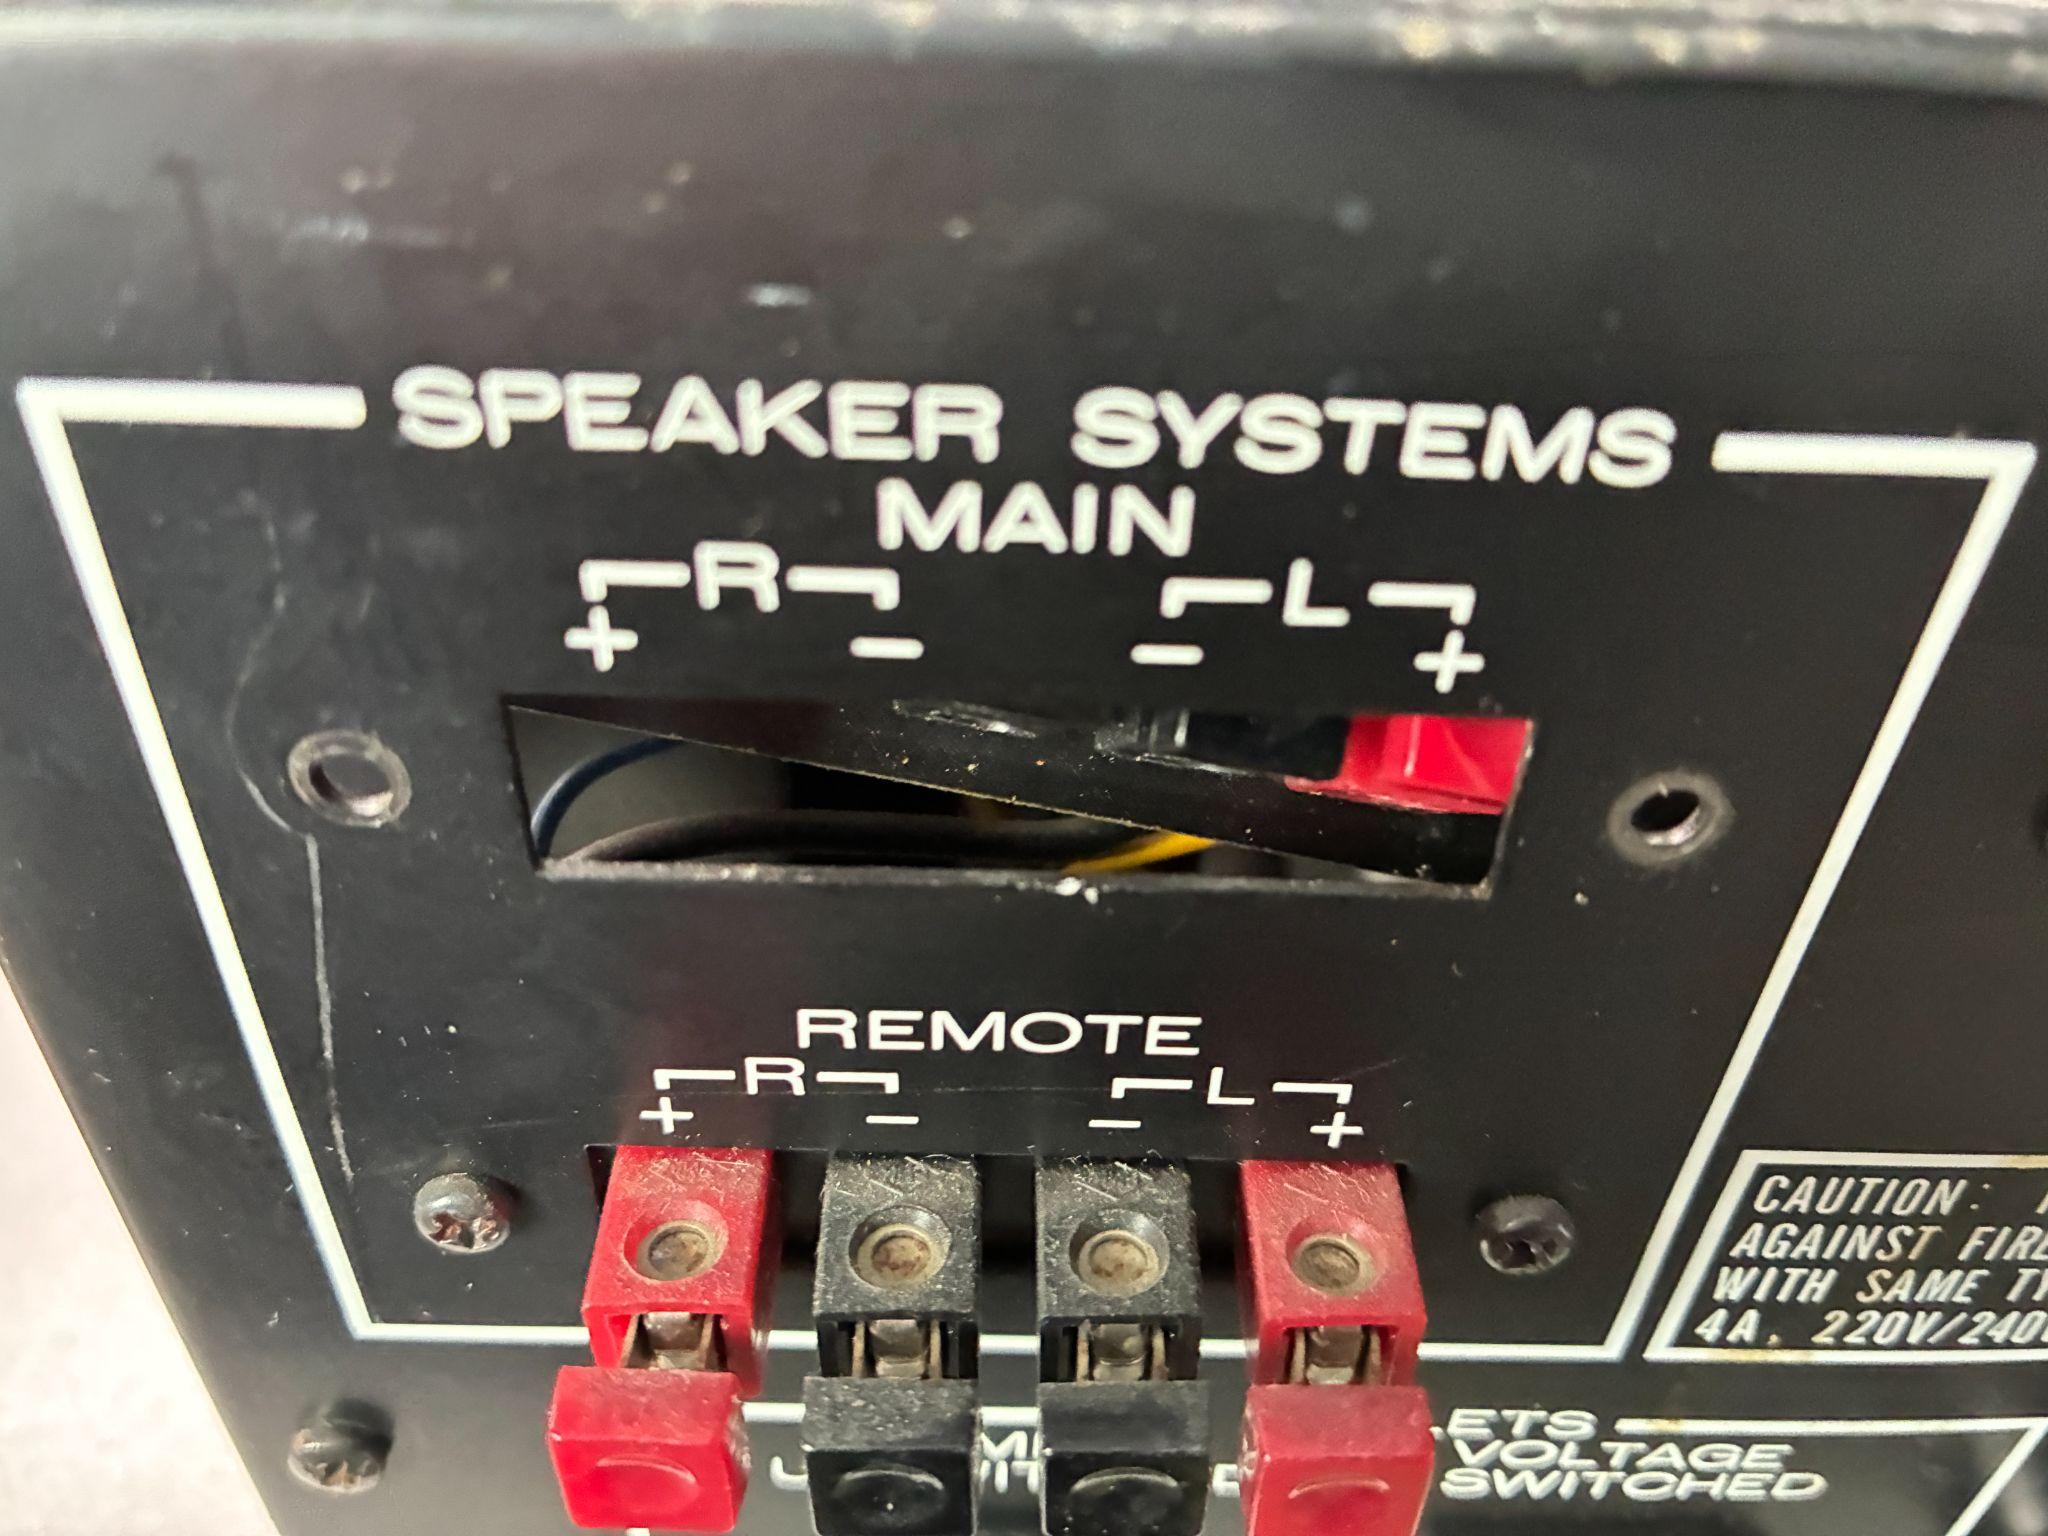
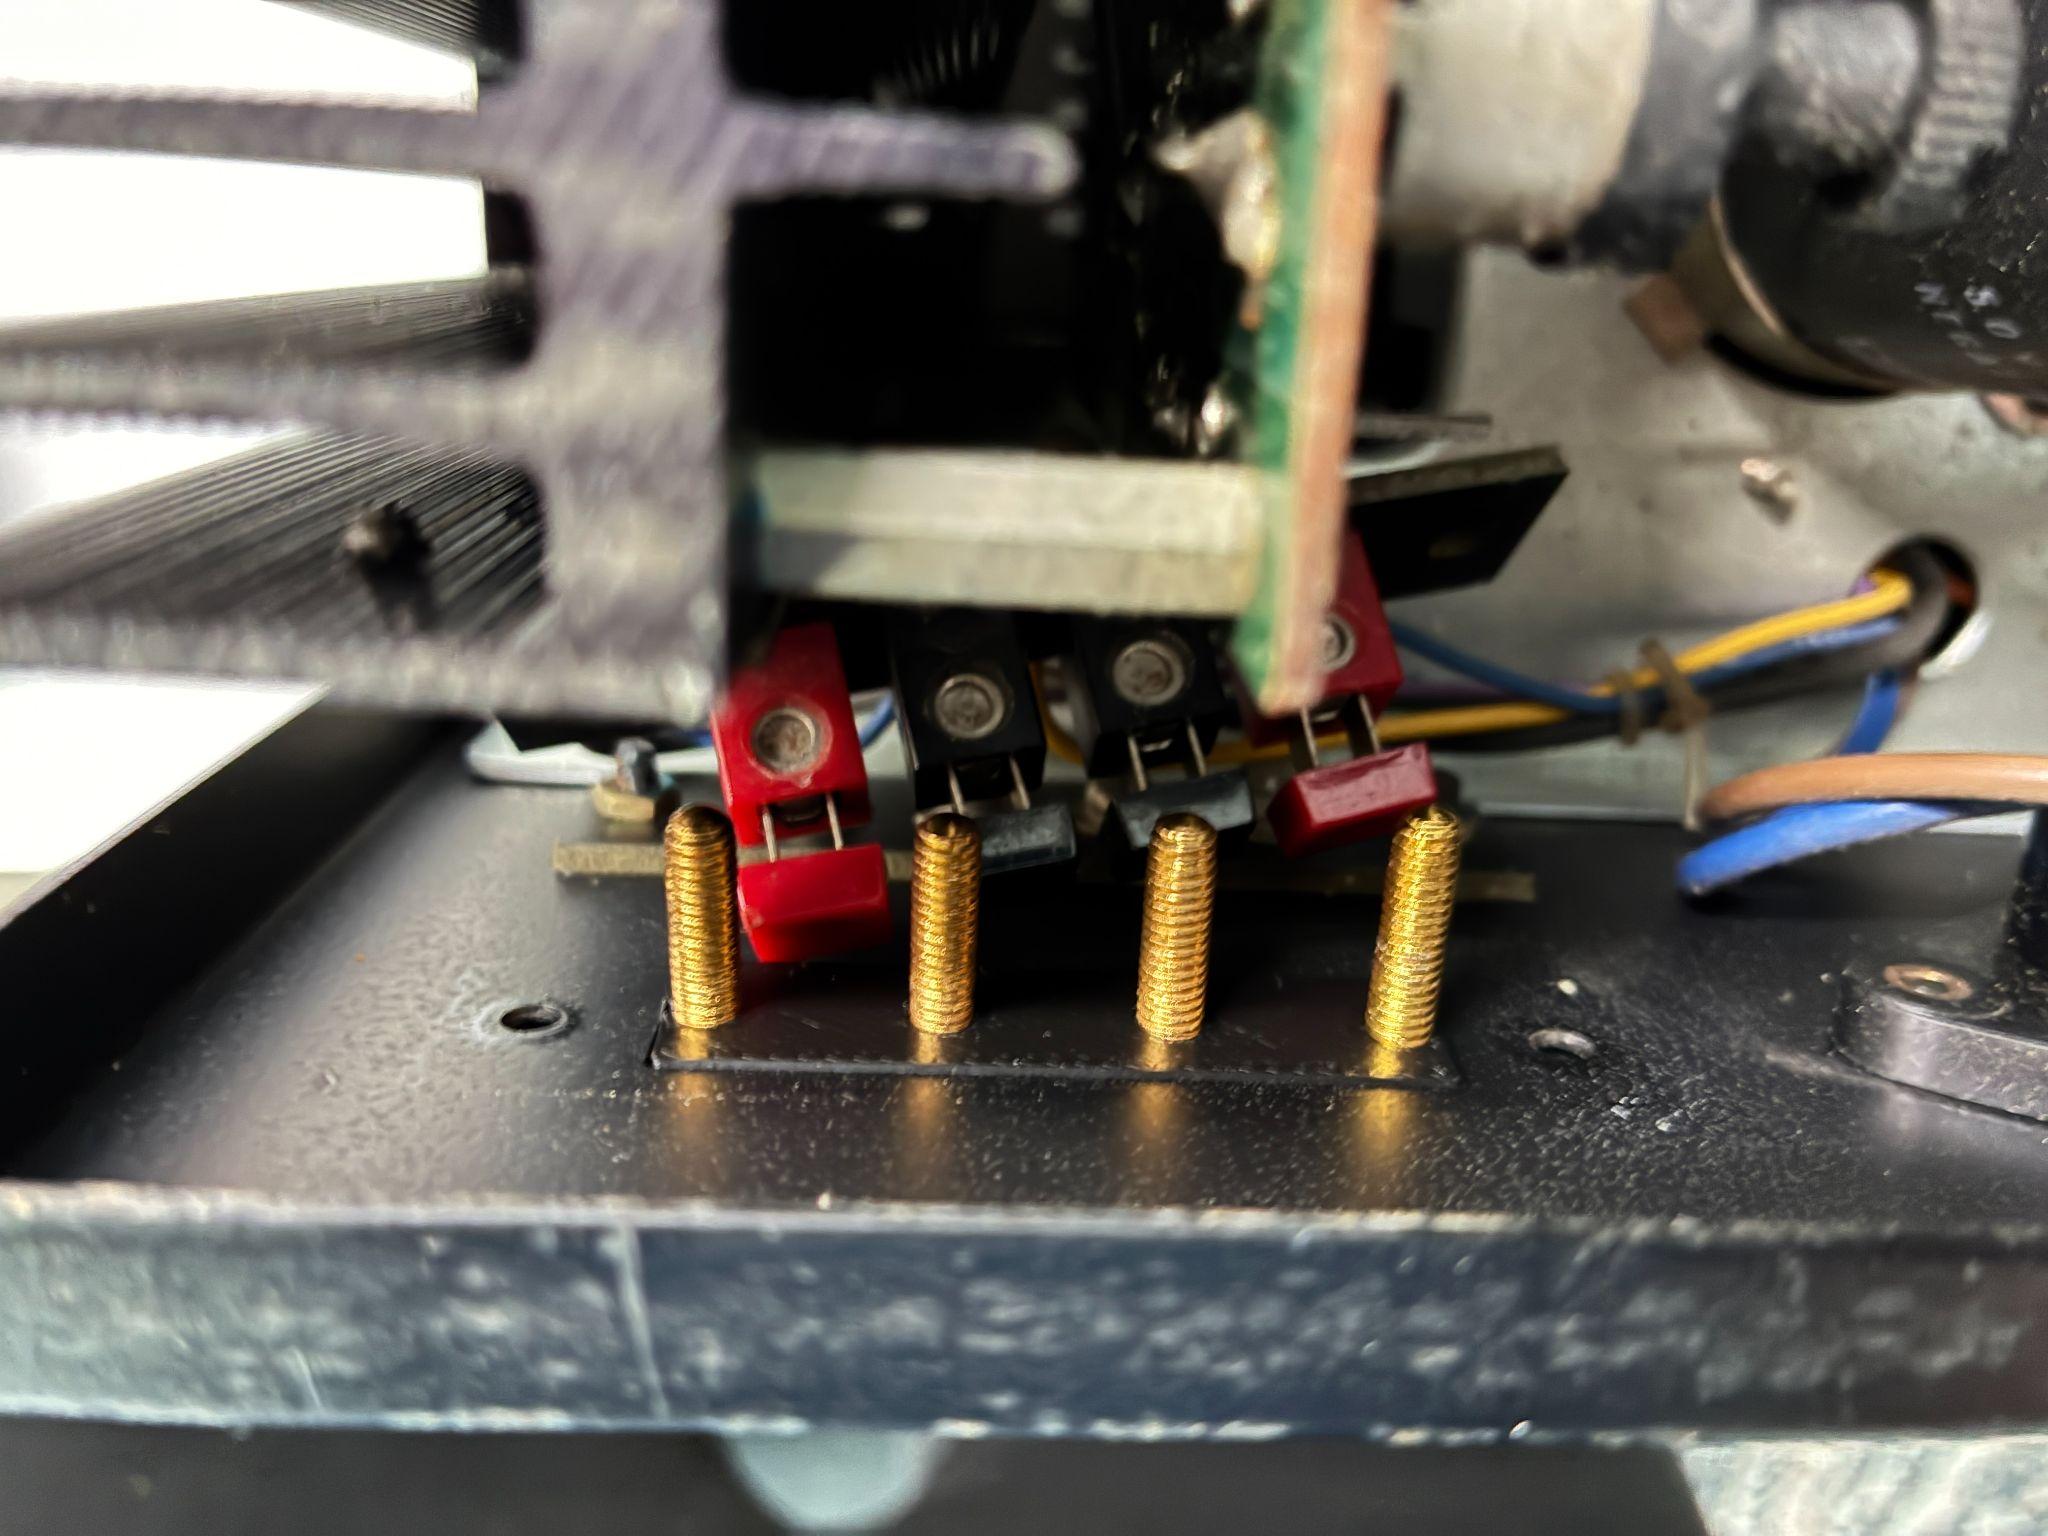
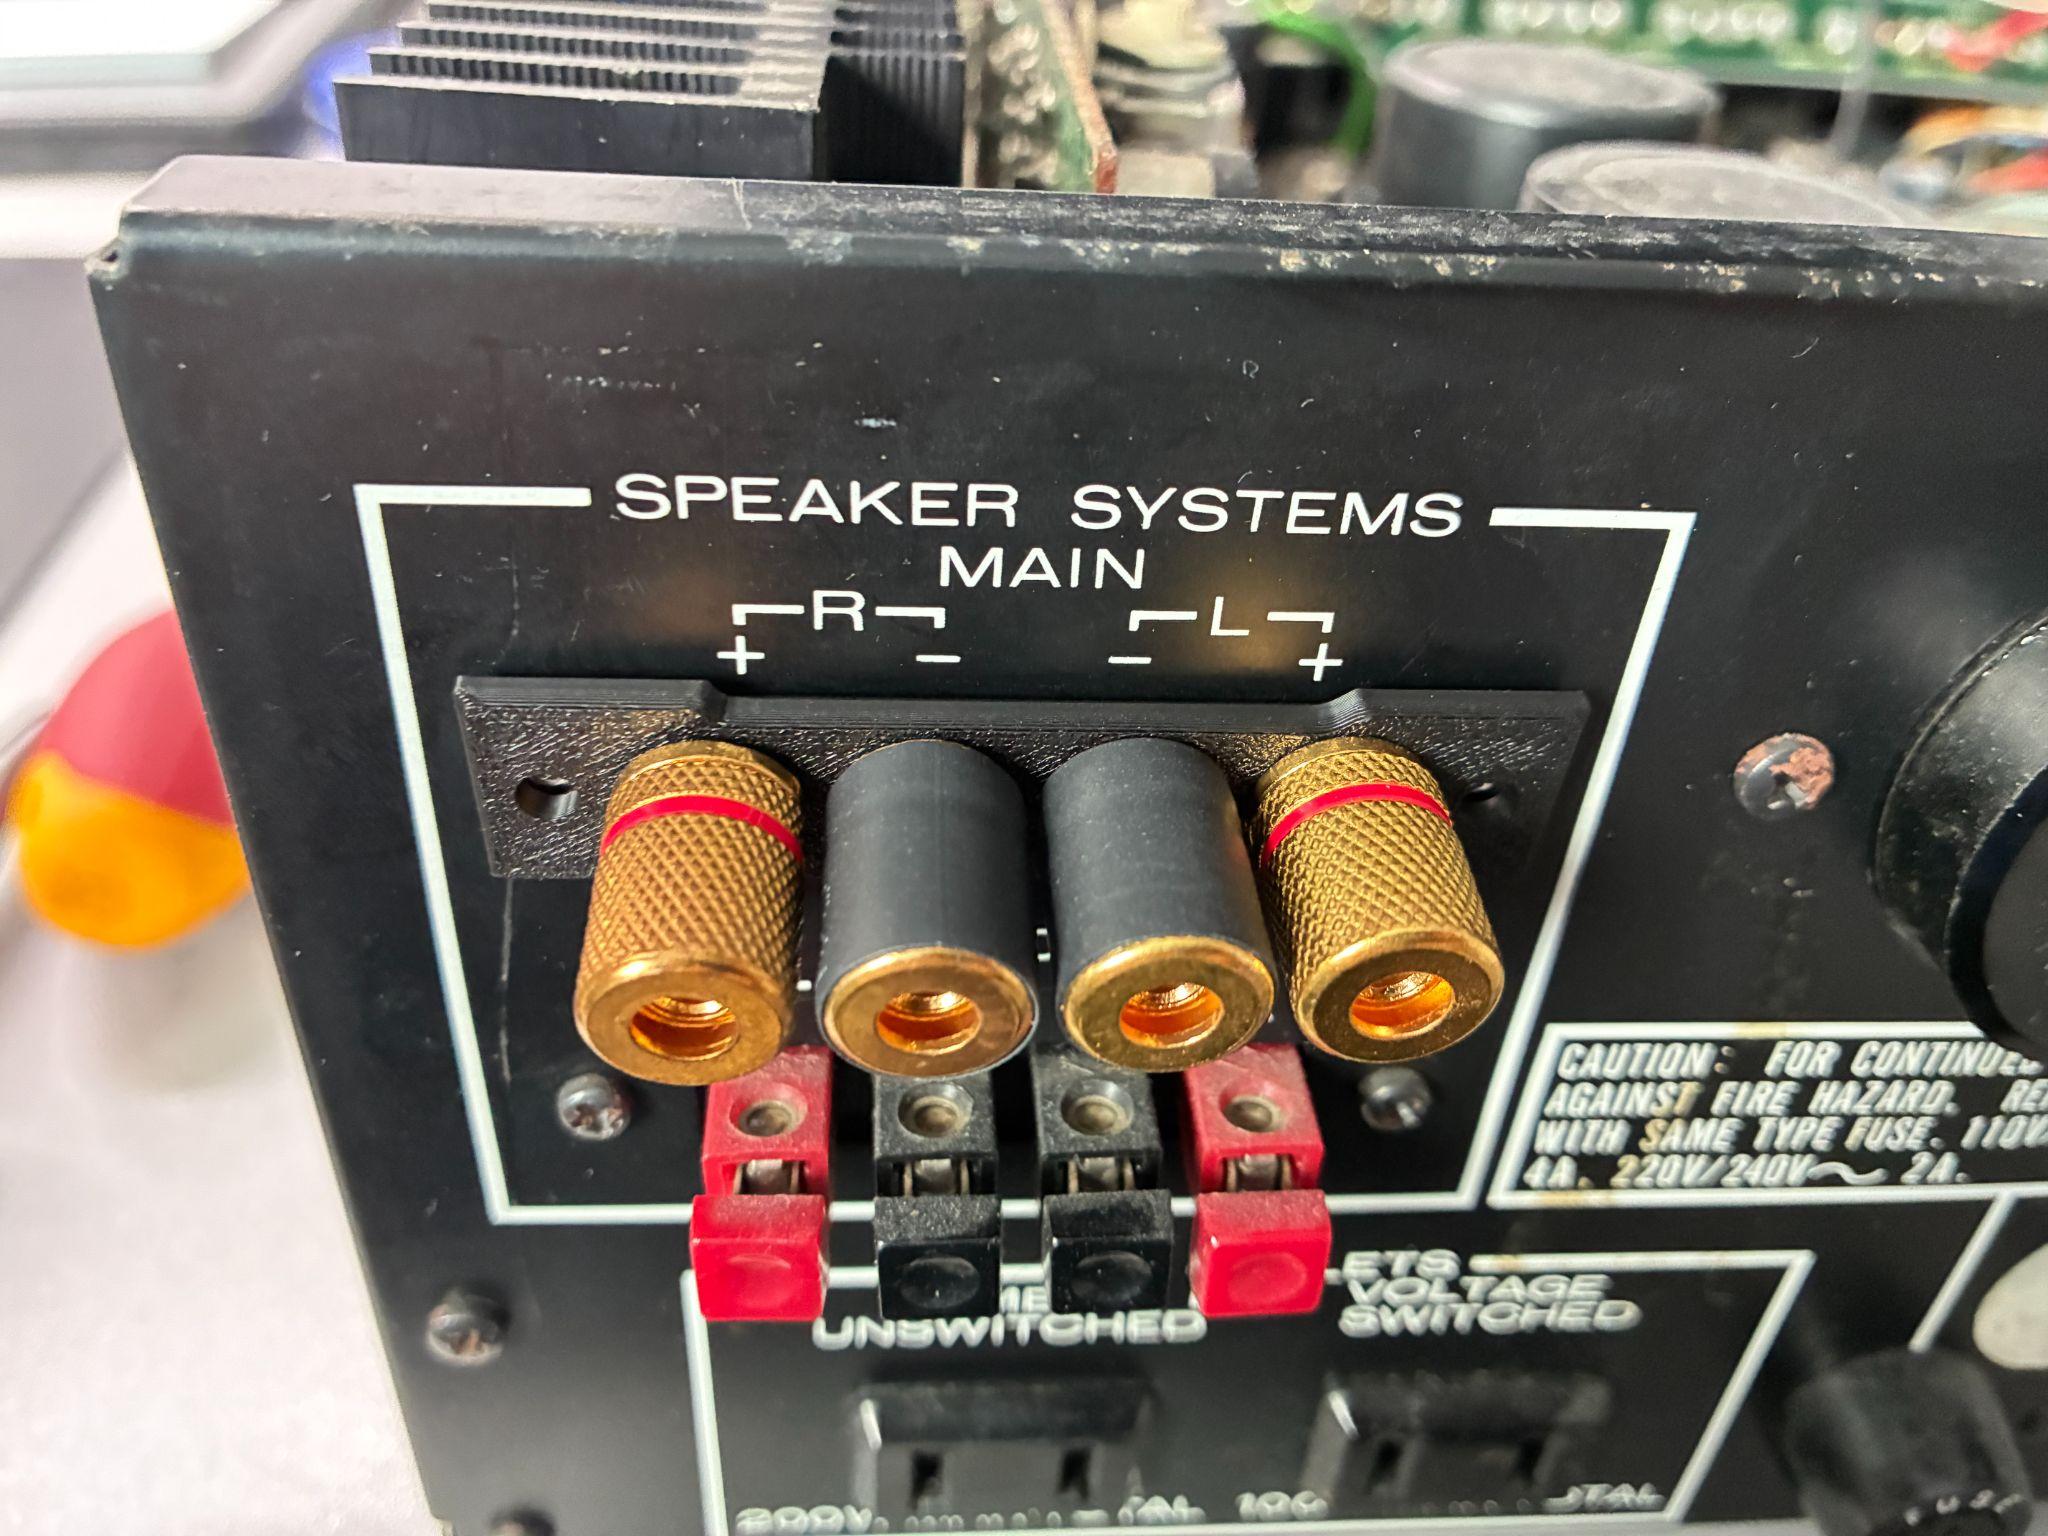
Step 1 — Check Your Original Terminals
Compare your unit's rear panel with the photo. The original terminals are small spring-clip blocks mounted on a narrow bracket. If your terminals look different, contact us before proceeding to confirm compatibility with this kit.
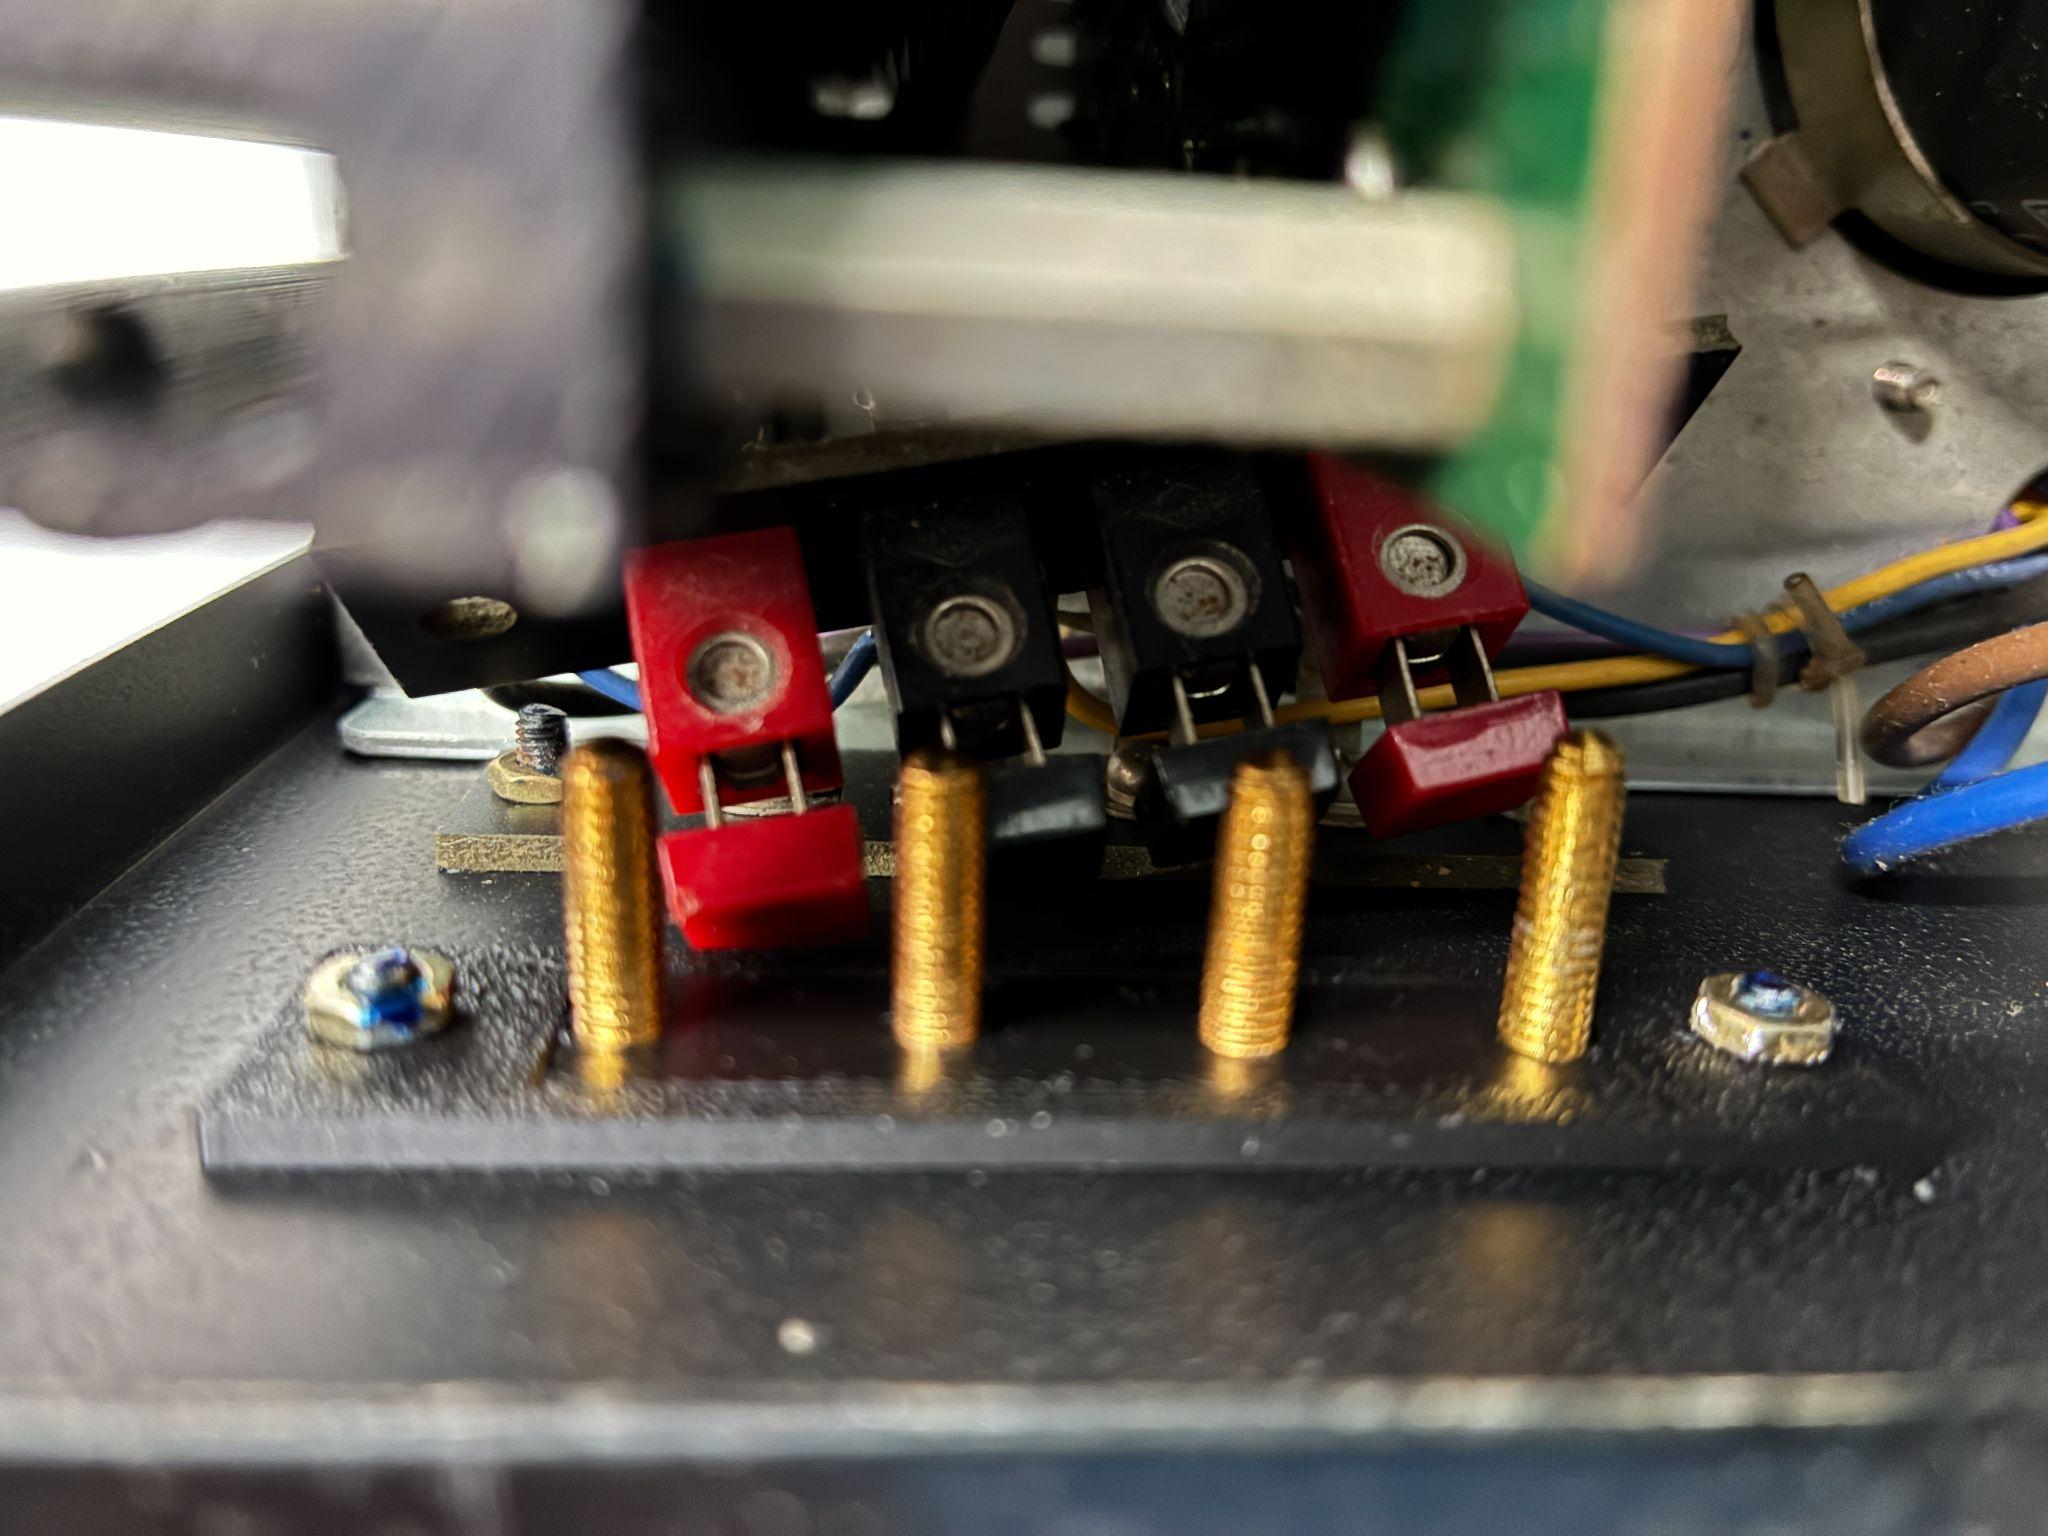
Step 2 — Remove the Mounting Screws
Locate the two small screws securing the terminal block to the rear panel. Unscrew and remove them. Carefully pull the terminal assembly outward — the internal speaker wires are still attached, so do not pull forcefully. Support the assembly with one hand.
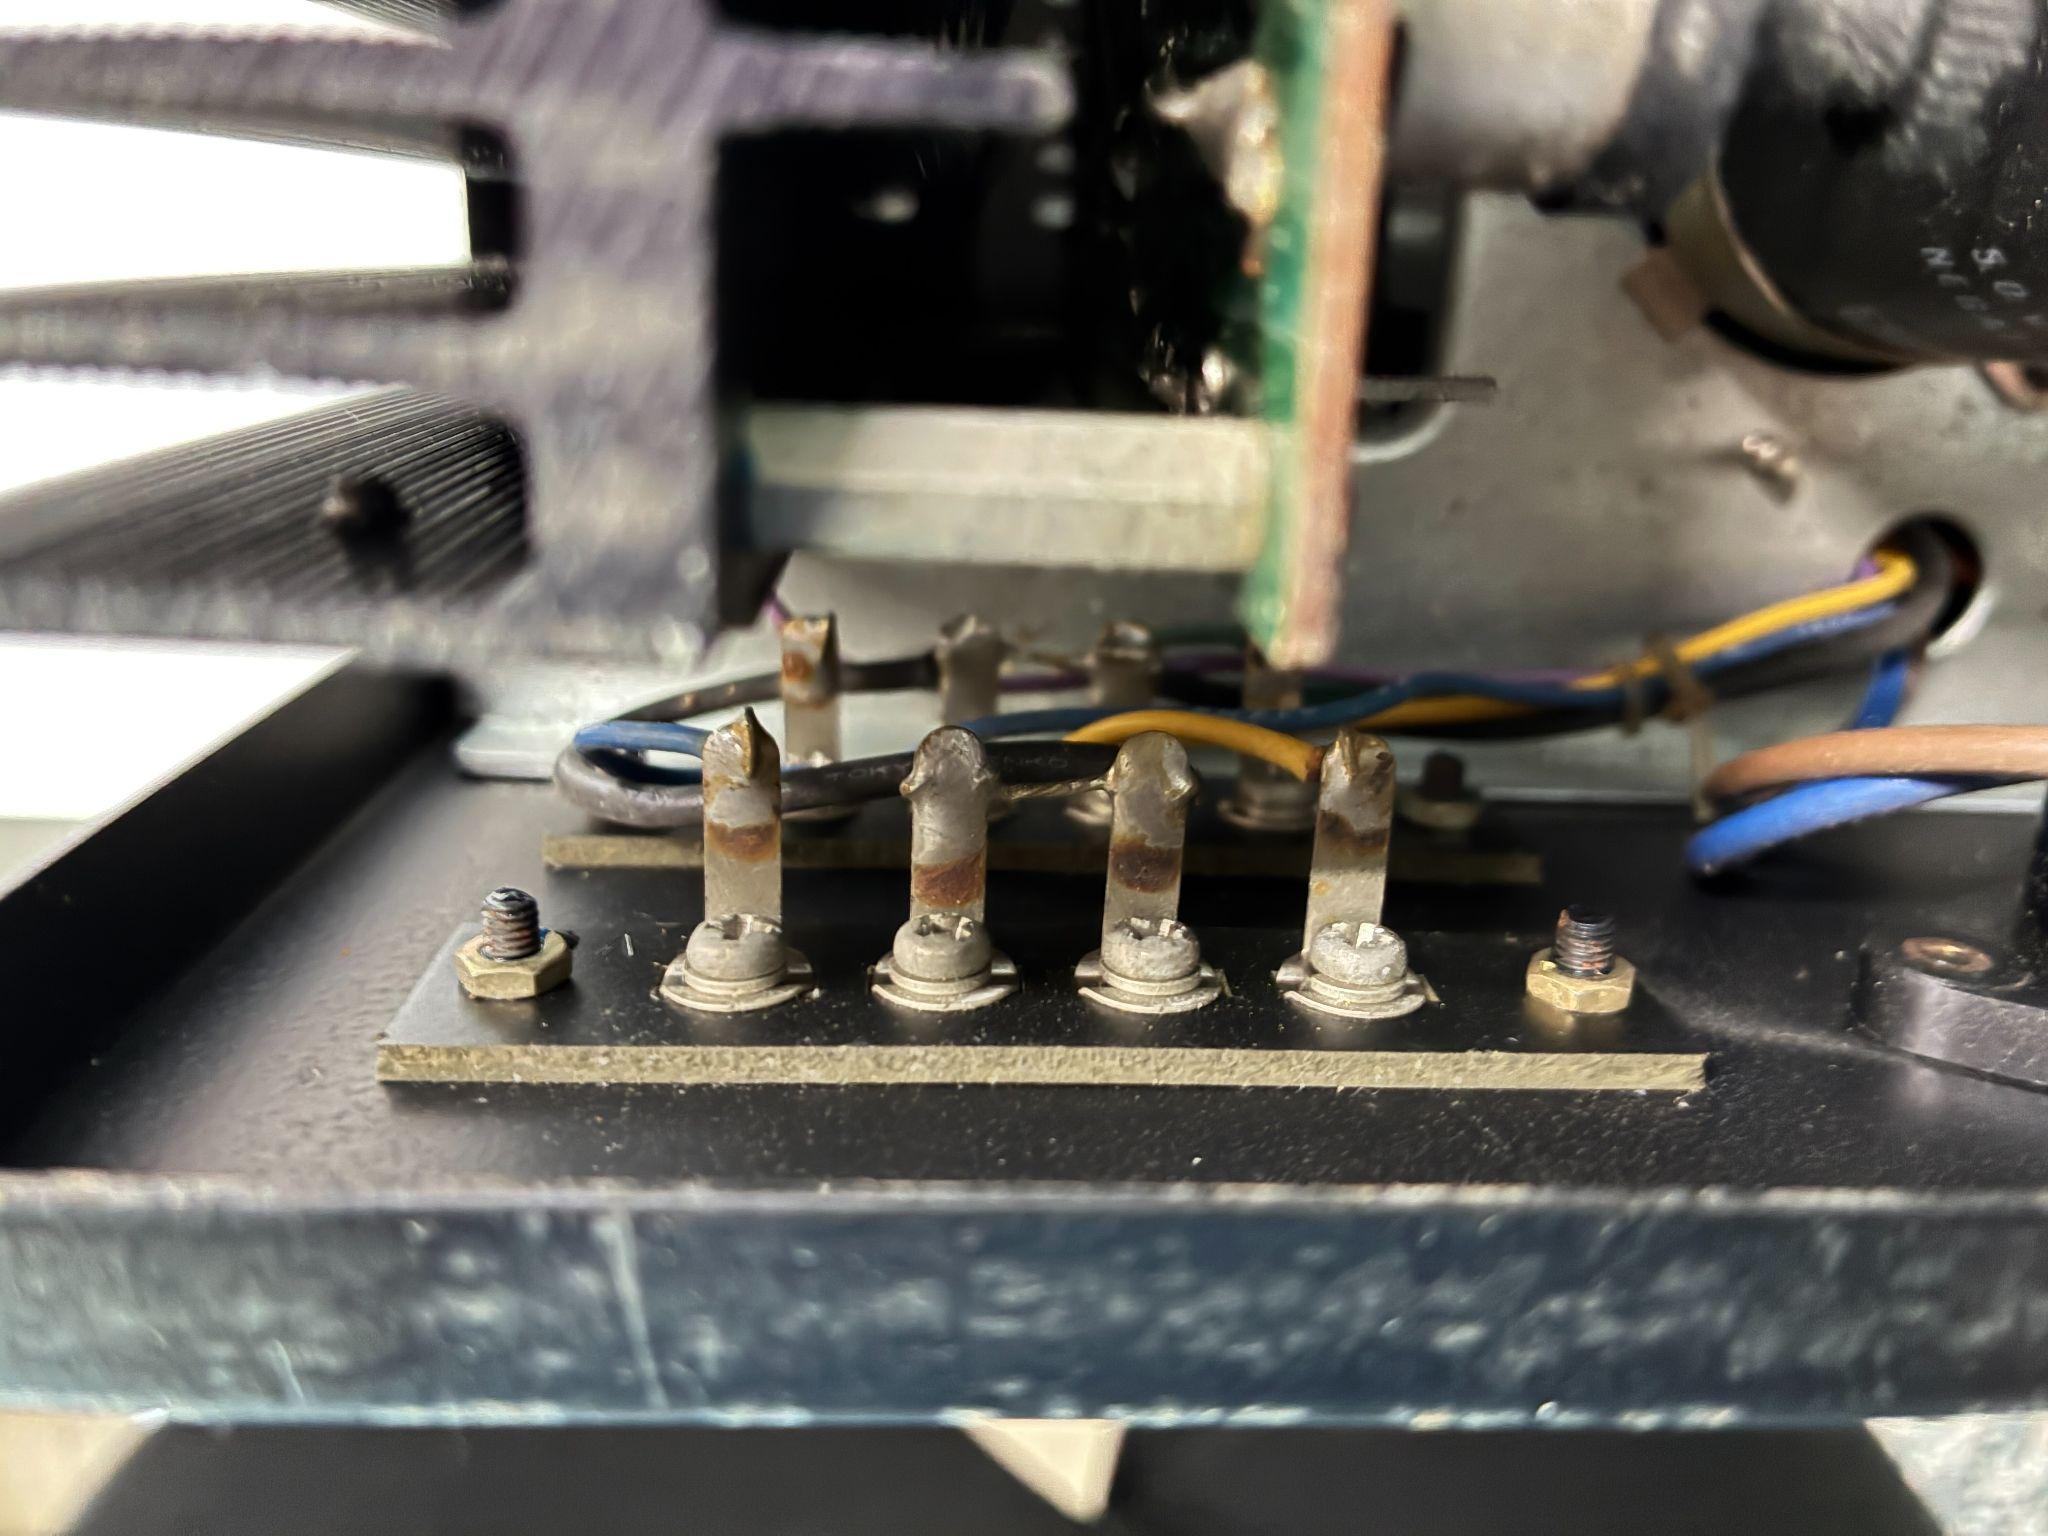
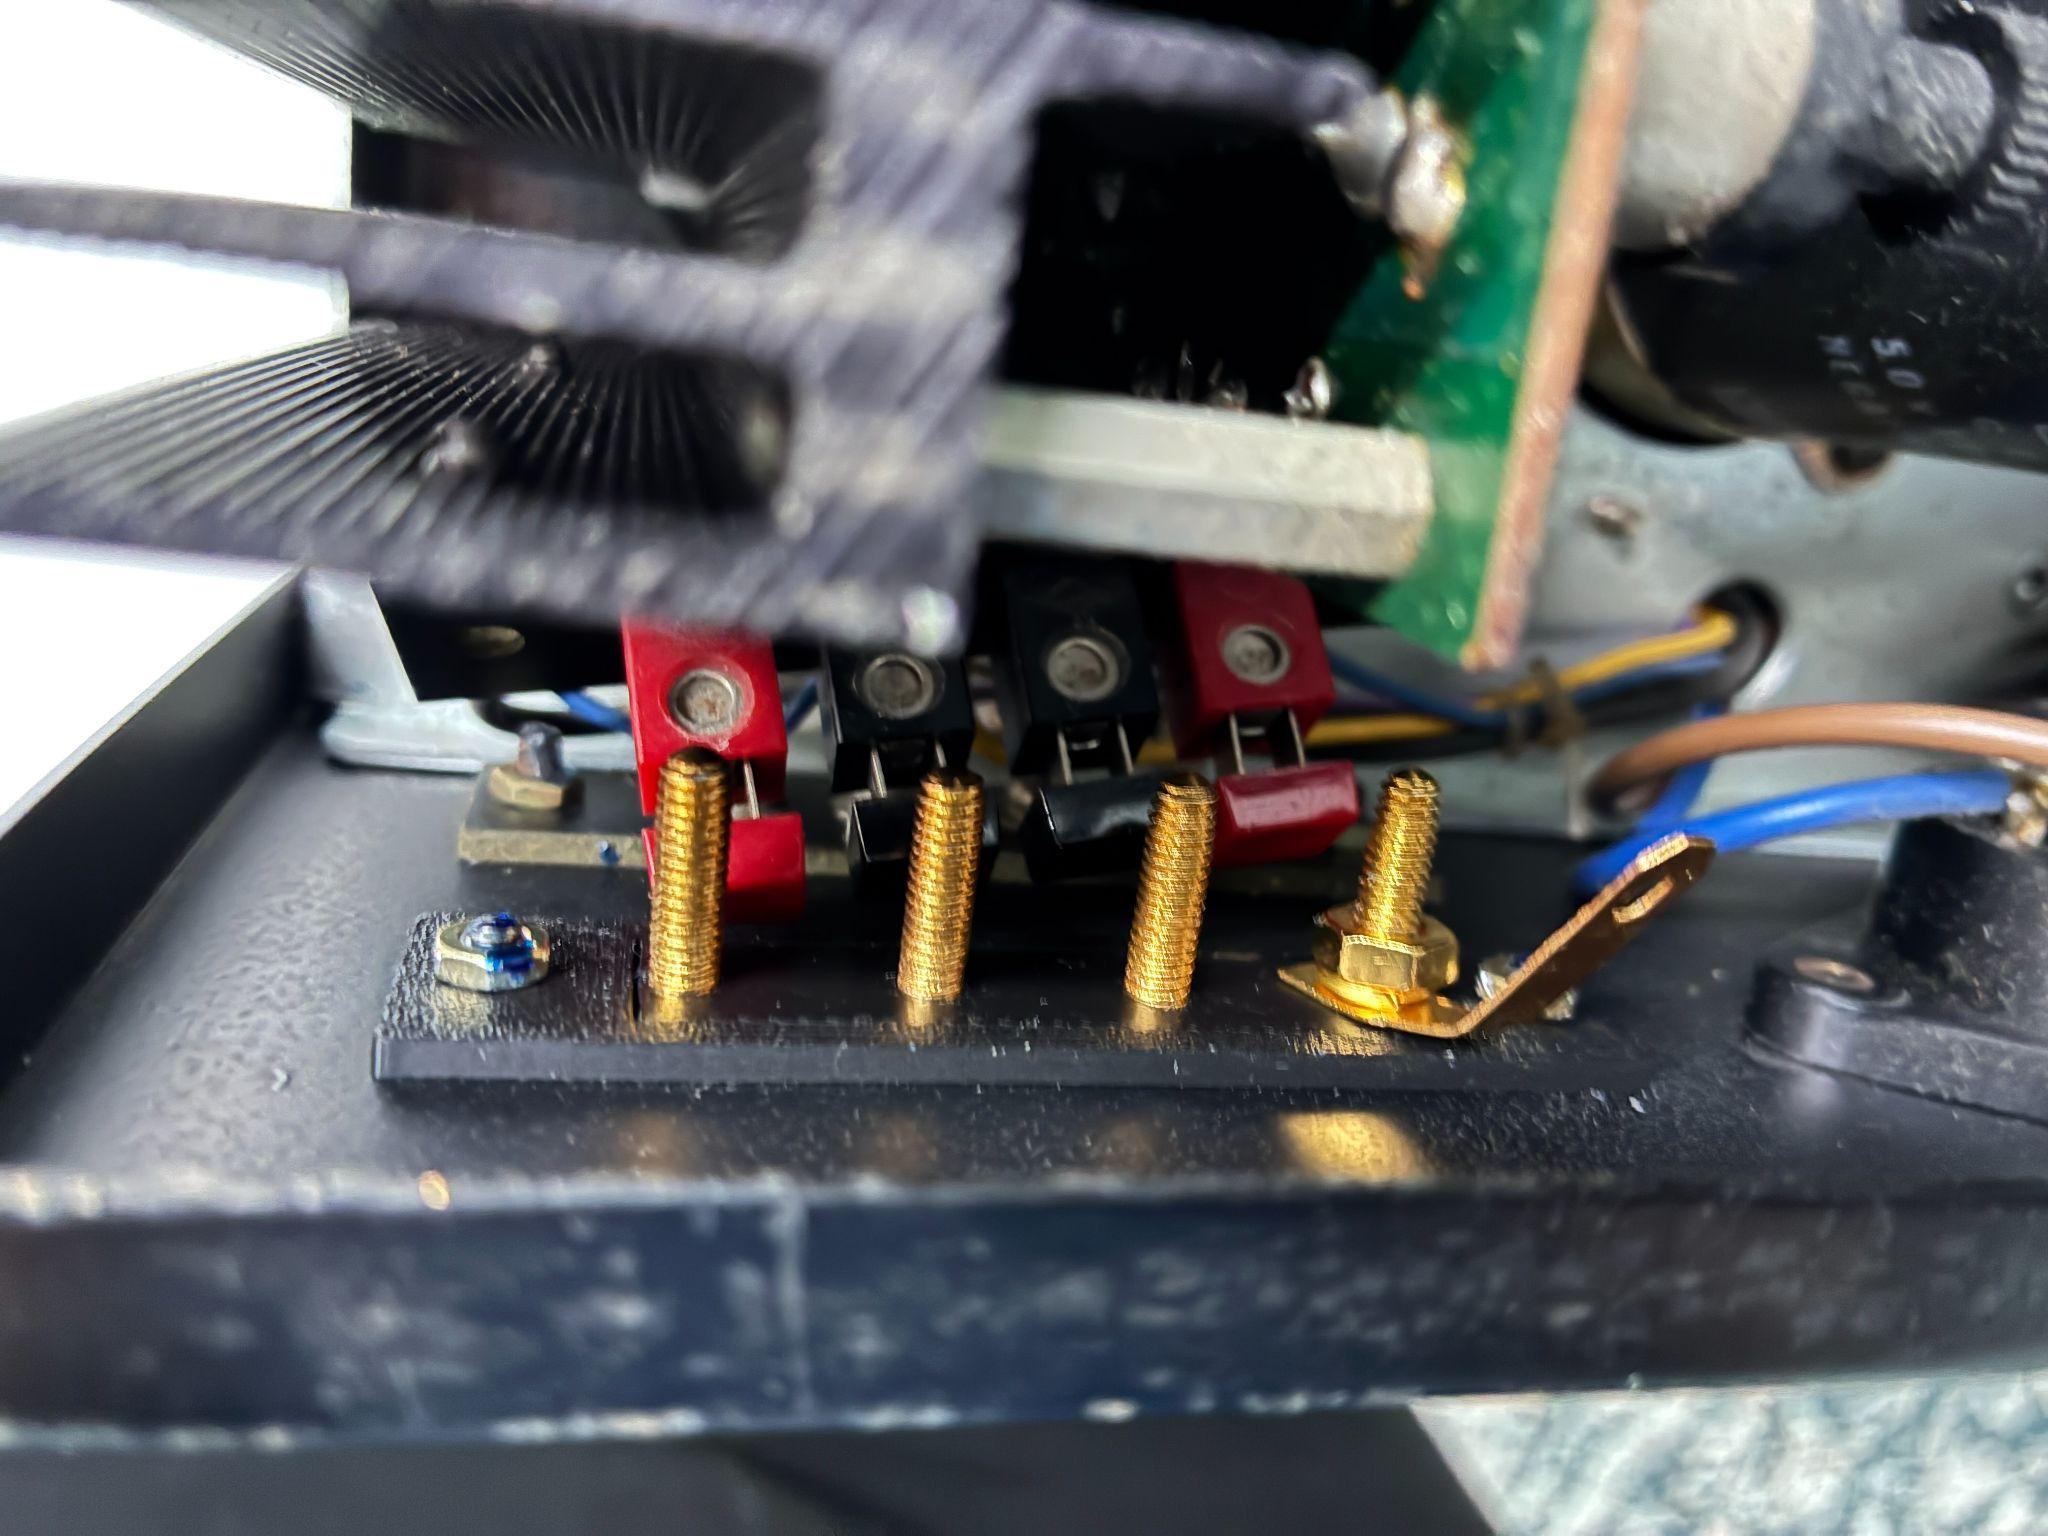
Step 3 — Free the Terminal Assembly
- Support the terminals with one hand — do not let them hang by the wires
- Note or photograph which wire connects to which position (+ / −, Main / Remote) before desoldering
- Desolder each wire: heat the joint 2–3 seconds, remove solder with a pump or wick
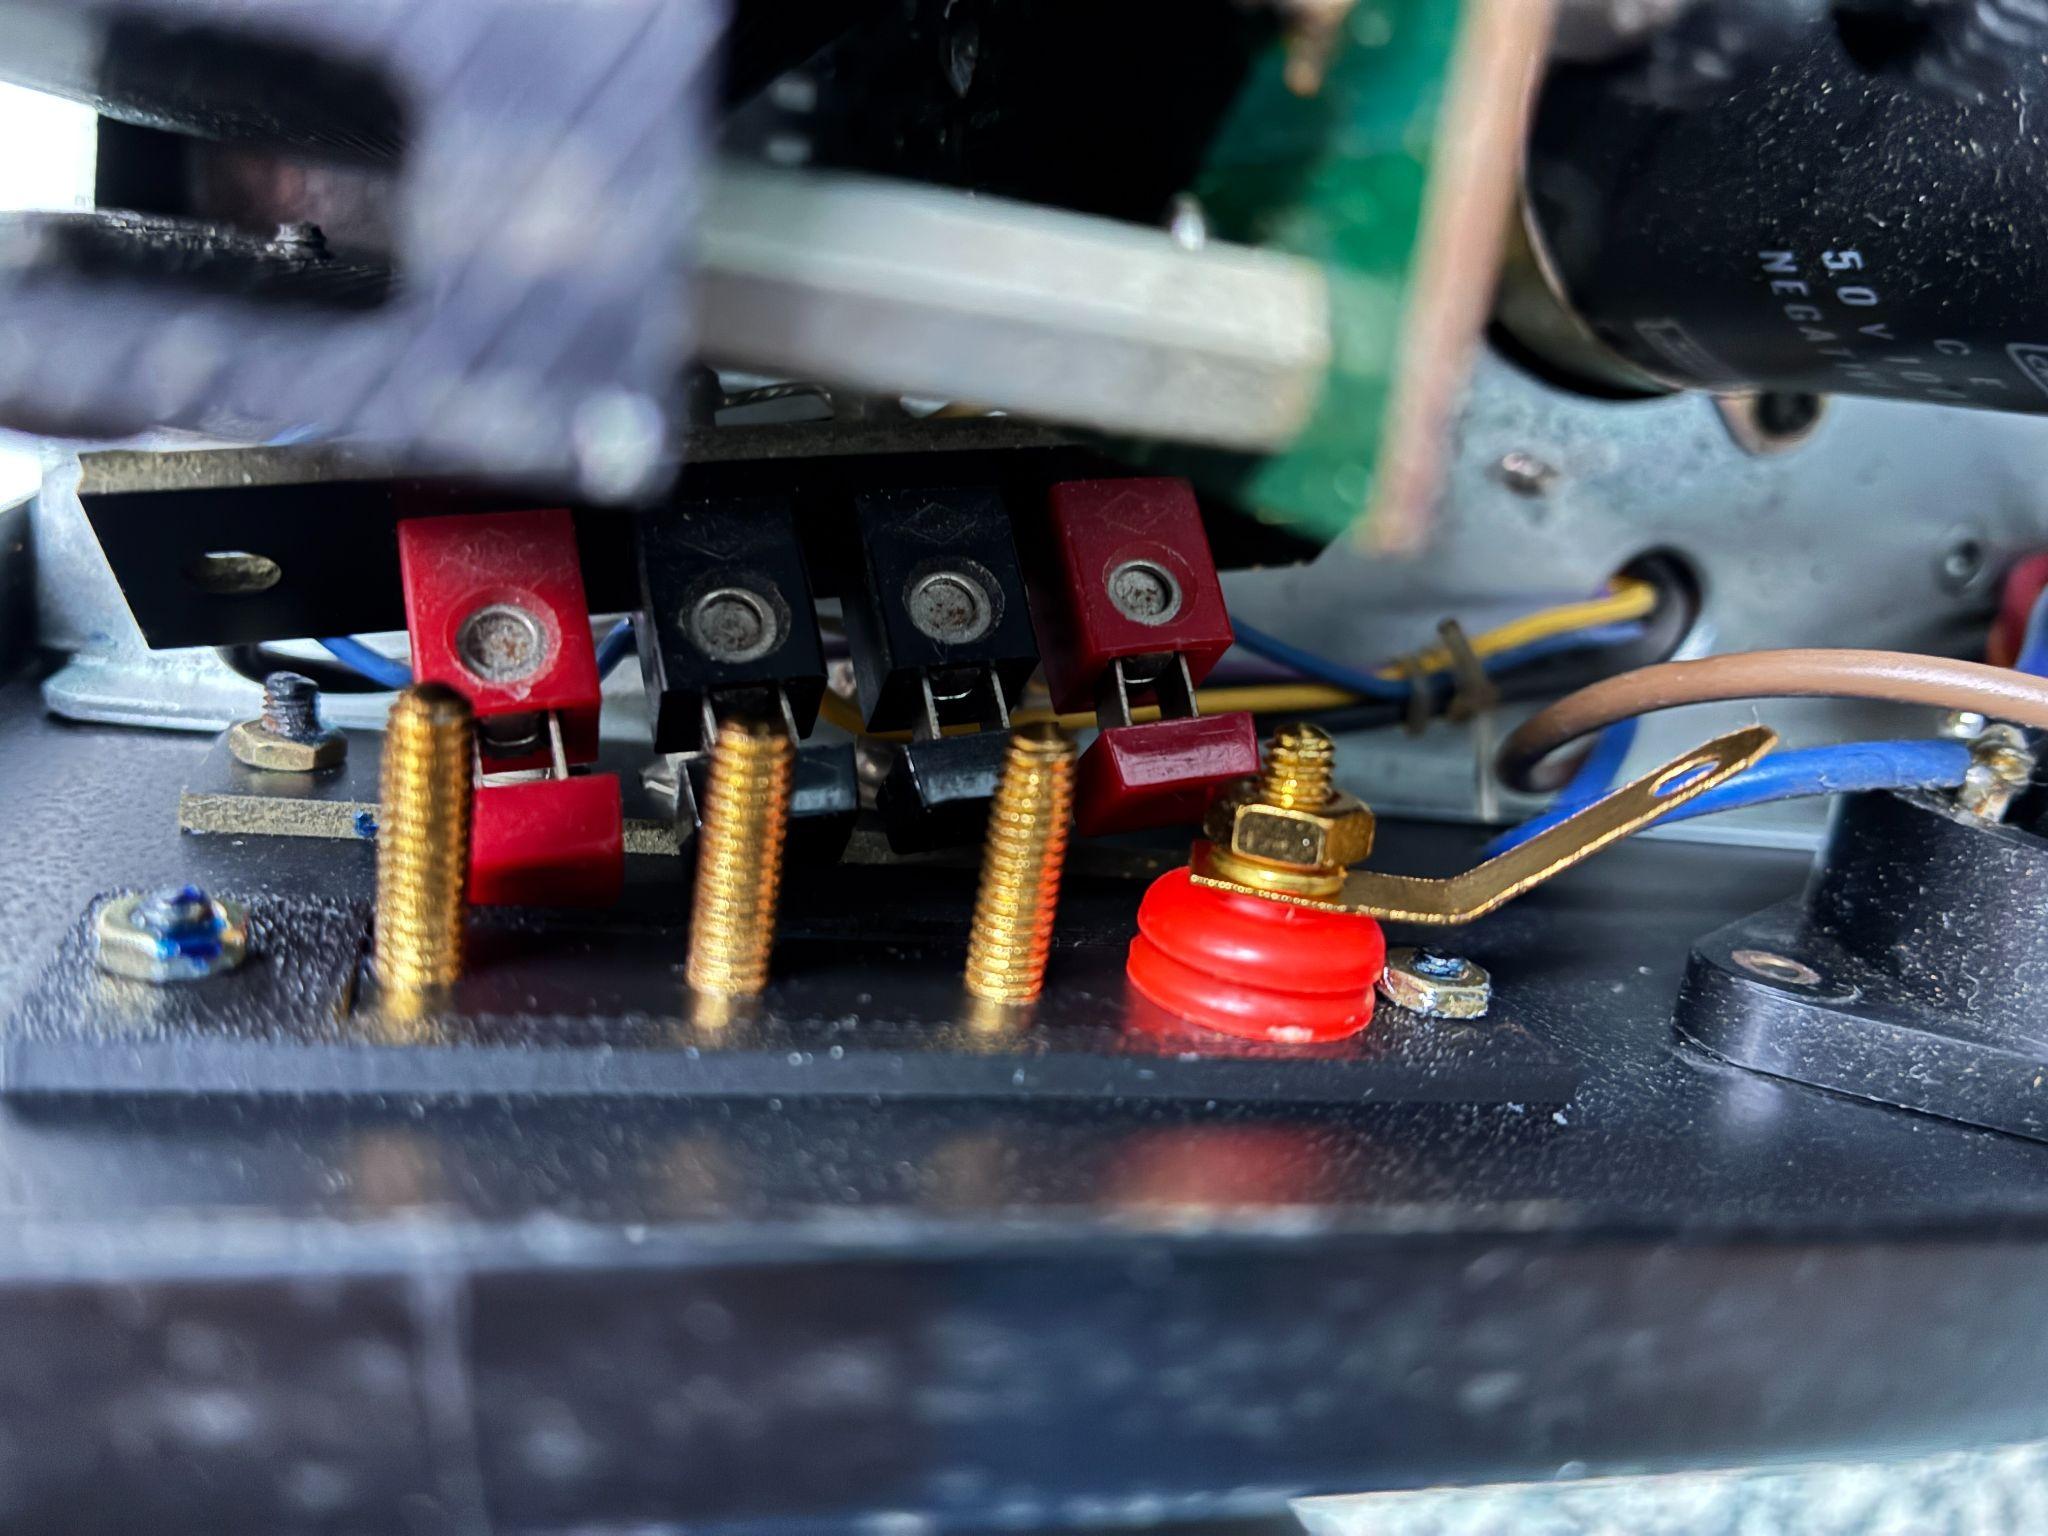
Step 4 — Assemble the Front Adapter Plate
- Do not tighten the nuts yet — leave terminals slightly loose for alignment
- Insert the front plate into the original rear panel cutout from outside
Step 5 — Install the Inner Adapter Plate
Thread the nuts onto each terminal post and tighten gradually and evenly — alternate between corners as you tighten. Do not overtighten — firm hand-tight is sufficient. The two plates clamp the rear panel between them, creating a solid mount without any chassis modification.
Step 6 — Connect the Speaker Wires
Insulating sleeves: the black terminals include removable rubber sleeves. Keep them installed for most setups — they prevent accidental short circuits if banana plugs touch adjacent terminals. Remove only if your specific connector type requires clearance.
Step 7 — Final Inspection
- Verify all nuts are properly tightened
- Confirm both adapter plates sit flush against the rear panel
- Check all wire connections are secure and polarity is correct
- Ensure positive and negative terminals cannot contact each other
Frequently Asked Questions
Ready to upgrade your Marantz?
The kit used in this guide ships from Poland. Includes 2 adapter plates and 4 gold-plated binding posts.